If you follow my Twitter account (MollieTobias) you may have heard me Tweet about some headshots that I was working on. Well, they were for Aging Outreach and here they are!
You can visit their website at http://agingoutreachservices.com/.
Monday, August 31, 2009
Friday, August 28, 2009
Friday Site of the Week - Interviews by Crash Taylor
The site of the week this week is really interesting for those of you who like to hold up the old measuring stick once in a while and see what other photographers are doing. Crash Taylor interviews a lot of big names in wedding photography on his site. He also has a really good portfolio that you should check out while you are there.
Check it out at http://www.interviewsbycrashtaylor.com/
Have a great weekend!
Check it out at http://www.interviewsbycrashtaylor.com/
Have a great weekend!
Wednesday, August 26, 2009
Leveraging a Bridal Show
Last week I posted some images from the bridal show that I attended at National Golf Club and today I wanted to go a little more in depth about why I feel like it is a good idea to attend bridal shows even if you are not an exhibitor and how you can use the knowledge you gain at the shows in your marketing efforts.
First, whenever I am planning to go to an event in the community I contact the local paper and let them know where I am going and see if they would be interested in some images. This is good because as you are walking around the bridal show or event is gives you "permission" to have your camera and be taking photos, it gives you an easy introduction to the vendors and to people attending the event, and then if the paper likes your images and chooses to publish some of them it will give you a little bit of recognition. It is also a great way to start building relationships with your vendors. It is good exposure for them to have your images of their products in the media, so the more often that you get published, the more often they get published, and the more likely they are to work with you.
There is still more you can do once you leave the bridal show and submit your images to the paper. Pick a few select images from each vendor, watermark them, and get them printed at 8x10 or whatever size you feel is appropriate. While you were at the bridal show you had a great opportunity to see how the vendors display their products. Do they have boards? A book of 8x10 images? A slideshow? Use that knowledge to deliver your images to them in a way that will be most useful to them. I had previously written a post about making boards for vendors. Come to find out (after they were already printed and paid for) the vendor that I made the board for works out of her home and displays images in a binder. She didn't have room for the board I had designed so that ended up going in storage. Chalk it up to learning experience. Now I know that most of my vendors prefer 8x10's.
I also made a gallery on my website for the photos from the bridal show and took the extra time to go through and caption each image with the name of the vendor whose product is shown. Now, when you go to deliver your prints, you can mention to them how you are already promoting their products on your website and this can serve as a jumping off point for negotiating for you to have a display, business cards, or other promotional materials in their store (if they have one).
So now from one free admission and a couple hours of your time you have gotten portfolio material, possible coverage in the media, and you are creating vendor relationships that will hopefully lead to referrals. Not a bad days work!
Monday, August 24, 2009
Picture Monday - Washington DC
Happy Monday morning to you all! I am getting the feeling that it is going to be one of those days already so I thought it was time to flash back to some vacation pictures. I recently went to our nation's capitol for the first time and while I was there I obviously wanted to take some images of the monuments on the mall. I also wanted to take some that were not your typical tourist shots so I was trying to be creative with things that you have already seen a hundred times even though you've never really seen them.
I got lucky and though it was 90+ degrees outside, we had an amazing sky to work with. None of these photos have been processed, they are all S.O.O.C. Let me know what you think!
Friday, August 21, 2009
Friday Site of the Week!
The site fo the week this week is one that I discovered following Kevin Kobuta on Twitter. It is http://www.rocknrollbride.com/. Fun stuff for brides to be that want to have their wedding days on their terms. Surf on over and check it out!
Wednesday, August 19, 2009
How to Make a Watermark from your Logo
Like they say, better late than never!
Today I am going to show you an easy way to make a watermark from your logo or text that you can use to stamp photos that you plan to give to consultants, use on your website, or give to clients as proofs.
First, I do not think that there is anything wrong with watermarking prints that you are giving to consultants or vendors. They get great pictures of their product and you get a little bit of free advertising. It's a win - win.
You could automate this whole process with an action, but I prefer to crop and place watermarks on each image individually to ensure that I am happy with the end result.
To get started you can either use your logo or you can make a watermark from text if you do not have a logo. You will need to have either on a pure white background for this to work. My logo (luckily) already has a white background as you can see below.
First thing that I did is convert my image to grayscale. Brushes only work with black, white, and shades of grey so working in monochrome is key to staying within the usable shades. The way that the colors work once you define the brush is that white is subtracted from the image, black is 100% opaque, and grey takes on less opacity the less black is in the color (90% grey would be 90% opacity, 40% grey is 40% opacity, etc.) just like if you had a black logo on a layer and you lowered the opacity. You can use this knowledge to create some cool effects with different levels of opacity in your logo. I like my entire logo to be semi-opaque so you will notice that nothing in my logo is pure black (see below)
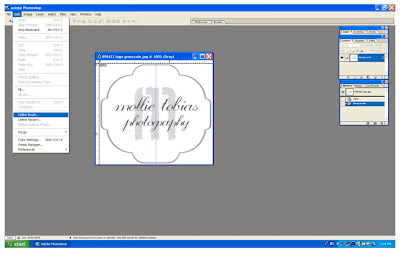
Once you have your logo how you like it, flatten the image and then go to Edit -> Define Brush.
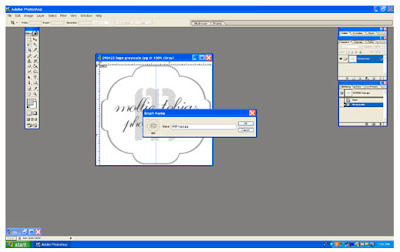
A window will pop up asking you to name your brush. I named mine MTP logo. If your image is too large you will not be able to select define brush from the edit menu. Resize your image to be smaller and try again.
After you have named your brush and clicked okay select the brush tool from the palette or type "B" to select the brush tool. To locate the brush that you just created navigate to the brushes toolbar at the top of your screen or go to Window -> Brushes. You should see your newly defined brush listed if you click on "brush tip shape" in the brushes drop down. Select your brush and then adjust the size to fit the image that you are planning to watermark.
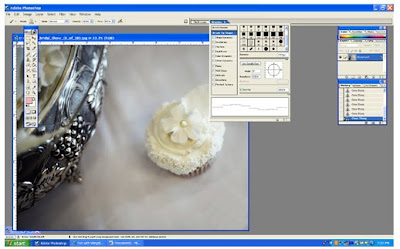
Type "D" to return the color swatches to the default black and white. I always use either black or white when watermarking but you can experiment and see what you like best. To toggle between your drawing and erasing swatches you can type "X". Below is an example of my logo brush in white.
If you do not have a logo you can accomplish the same thing with text. Make a new document (I made mine 5" x 1" @ 300 dpi) and type the text that you want to appear as your watermark in either black or a shade of grey. If you want to use a copywrite symbol I have found that the easiest way to get one into photoshop is to open a Word document and insert it as a symbol and then copy and paste it into a text block in photoshop. Then you follow the same steps to define and name your brush as outlined above. The result can be seen below:
To Tide you over...
I really do have a great post in the works today but, unfortunately, life has a way of derailing the best laid plans and it has been one of those days so far...
So, look out for a post later tonight about how to make a custom brush of your studio logo to use as a watermark for photos that you plan to give to vendors or post of the web.
Until then, check out this article if you need a little air in your motivation balloon (who doesn't?)
http://mei500.com/blog/2009/08/guest-post-anatomy-of-a-rockstar-by-greg-schrader/
Sunday, August 16, 2009
Picture Monday - Bridal Show at National Golf Club
I hope that everyone is having a good Monday morning so far! I happen to be in a great mood - albeit a bit tired - because I got a lot of stuff done this weekend. One of the fun things that I did on Saturday was take a trip over to the bridal Show at National Gold Club. Bridal Shows are a great place to get some wedding detail images without the wedding. Here are a few from Saturday's show...
This great vignette of a table scape and florals was done by Aldena Frye Custom Floral Designs. I love the colors!
A sample bridal bouquet with roses and lilies. So pretty.
Some formal wear from Brides, etc. I love the monochrome theme.
Cakes by Sherran had some really pretty cakes and cupcakes to go along with the white wedding theme.
Kay Curlee and Carol Sylverstein of Southern Pines Paper Company had lots of great letterpress.
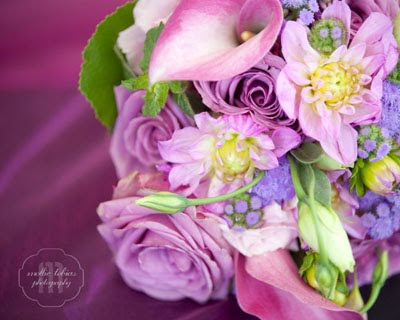
Color was the theme at the Botanicals booth with an array of beautiful bouquets in hues of pink, yellow, and purple.
Friday, August 14, 2009
Friday Site of the Week!
The site of the week this week is a great one if you are a bride to be. I stumbled upon Twig and Thistle while I was reading Style Me Pretty (which if you haven't looked at yet you should go do so NOW) This site is full of great DIY projects for creative brides on a budget and great eye candy for photographers or lovers of cute vintage stuff. The blog is located at http://www.twigandthistle.com/blog/.
Because I am also super giving I am going to throw in a second site for FREE! I am IN LOVE with this site which I found by following Stacy Reeves on Twitter and I want to buy pretty much everything on the site, especially the dresses. Best part, the are actually reasonably priced. How's that for a Friday find? Have a great weekend!
Wednesday, August 12, 2009
My thoughts about Twitter
When I first started using Twitter all I could think was, "I don't get it". Then I started feeling like maybe I am just to old to understand it which is not a fun feeling at 27! After using Twitter for a little while now and I think that - while clearly not an expert - I am starting to get the hang of things so I thought that today I would take some time to pass along some of my thoughts and insights into the matter.
It seems to me that to be a successful Tweeter, or Twitter user, Twitterer, whatever first you need to know why you are there. Is this to keep in touch with friends and family, advertise your business, network, etc. For me the goal was to get the word out about my new business and network. So, not knowing what else to do I got on Twitter and started tweeting about me. That didn't really go so well. Tweeting only about you is kinda like going to a party and only talking about yourself all night long. Boring!
But, I didn't know anyone yet. So, I started by following photographers who I knew about from their blogs. Then I added in vendors that I use. After that I read an article about 9 people all newbies should follow on Twitter, so I followed those people as well. By this time I was following quite a few people and my stream was really full of a bunch of stuff I didn't really care about and still nobody knew who I was.
It was about this time that I had my epiphany. Twitter is about having a conversation and sharing common interests with other people like you. After realizing that, I made a few changes. I dropped people I had been following if I did not end up reading any of their Tweets or if they weren't in my area of interest. I also stopped following people just because they were following me. This was hard for me in a way because it seems so mean to not want to follow someone but not everyone is a good Twitter match for everyone else so there really shouldn't be any hard feelings (I hope!).
Then I discovered re tweeting. Now I also figured out that there are some people who you follow because they consistently provide good content that you like to pass along and others you follow because you share common interests and can have conversations.
Then, if you are engaging in conversations with other members (as opposed to just pimping your website all the time) and re tweeting content you find interesting chances are that people will start finding you interesting and want to follow you too.
Those are just my observations from my personal experience so far. Let me know what you think in the comments. Have a great Wednesday!
Monday, August 10, 2009
Picture Monday - JD and Stacy
I first met JD and Stacy a few years back through my husband. Since then we have gotten to spend some time with them and their children getting to know them and were thrilled recently when they added a beautiful baby boy to their family.
JD and Stacy are such great people who truly do walk the walk. If they tell you that they are going to do something you can consider it done and it will be finished to 100% of their abilities. They also have the sweetest, most well behaved children I have ever met.
I was really excited to take some family photos for them at the Sandhills Botanical Garden. The girls were really into it and we spent an hour running around the park taking pictures wherever the girls wanted. I hope that you guys enjoy them as much as I did taking them!
Subscribe to:
Posts (Atom)